
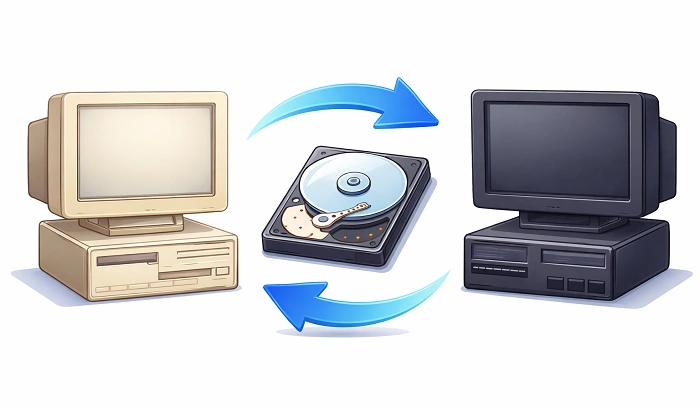
How to Convert a PCem Hard Drive to 86Box: Quick Steps
- 294 Views
- DiscoverNews Editorial Team
- November 11, 2024
- Business
Retro computing enthusiasts often use emulators to recreate classic PC systems from the 1980s and 1990s. Two popular emulators used for this purpose are PCem and 86Box. Both are designed to emulate vintage hardware with high accuracy, allowing users to run older operating systems, software, and games.
If you have already created a virtual machine in PCem, you may want to use the same virtual hard drive in 86Box. This can help you experiment with different hardware configurations or continue using your existing setup in another emulator.
This guide explains the general steps involved in converting or using a PCem hard drive in 86Box.
Table of Contents
ToggleWhy Convert a PCem Hard Drive to 86Box?
There are several reasons why users may want to move a virtual hard drive from PCem to 86Box.
Expanded hardware support
86Box supports a wide variety of vintage PC hardware, including different motherboards, CPUs, graphics cards, and sound cards. This flexibility allows users to experiment with more hardware combinations.
Active development and updates
86Box is actively maintained by its development community. Updates often include improvements in compatibility, stability, and performance.
Flexible configuration options
Users can configure detailed hardware settings in 86Box, such as memory size, storage controllers, and graphics hardware, which can help recreate specific historical systems.
Testing and experimentation
Moving a hard drive image between emulators allows retro computing enthusiasts to test how the same operating system behaves under different hardware configurations.
Steps to Convert a PCem Hard Drive to 86Box
In many cases, PCem hard drive images can be used directly in 86Box with minimal modification. The steps below outline the general process.
Step 1: Back Up Your Files
Before making any changes, it is important to create a backup of your virtual machine files. This ensures that your data remains safe if any problems occur during the conversion process.
Files worth backing up include:
- Virtual hard drive images
- Emulator configuration files
- Important files stored inside the virtual system
Saving a copy of these files in a separate folder or external storage device helps prevent accidental data loss.
Step 2: Install 86Box
If you have not already installed 86Box, download the latest version from the emulator’s official website. Installing the official release helps ensure compatibility and security.
To install the emulator:
- Download the installer for your operating system.
- Run the installation file.
- Follow the setup instructions.
- Launch the program once installation is complete.
After installation, open the emulator manager to begin configuring a virtual machine.
Step 3: Locate the PCem Hard Drive Image
Next, locate the virtual hard drive image used by your PCem virtual machine.
These files are typically stored in the PCem installation directory or in a folder you selected when creating the virtual machine. Common disk image formats include:
- .img
- .hdd
- .vhd
If you are unsure where the file is located, you can search your computer using these file extensions.
Step 4: Create a Virtual Machine in 86Box
Open the 86Box Manager and create a new virtual machine configuration.
During setup, you will need to select hardware components similar to the ones used in PCem. Matching the hardware configuration can improve compatibility with the existing operating system stored on the disk image.
Important configuration options may include:
- CPU type
- Motherboard model
- RAM allocation
- Storage controller type
Once the hardware configuration is complete, proceed to the storage settings.
Step 5: Add the Existing Hard Drive Image
In the storage configuration section, choose the option to add a hard disk image.
Select the PCem disk image file you previously located. In many cases, 86Box can use the file directly if the format is supported.
After attaching the disk image:
- Save the configuration.
- Start the virtual machine.
- Check whether the operating system boots correctly.
If the configuration matches the original hardware setup, the system may load successfully without further changes.
Troubleshooting Common Issues
Sometimes the virtual machine may not start correctly after importing the disk image. A few common issues can occur.
Hardware mismatch
If the operating system was originally configured for a specific storage controller or motherboard, changing these settings may prevent the system from booting.
Unsupported disk format
If the disk image format is not supported, you may need to convert it using disk image tools.
Performance problems
If the emulator runs slowly or crashes, adjusting CPU speed, RAM allocation, or graphics settings may help improve stability.
Online emulator documentation and community forums can also provide guidance when troubleshooting these issues.
Conclusion
Converting a PCem hard drive for use in 86Box allows retro computing users to continue working with their existing virtual systems while exploring a different emulator environment.
By backing up your files, installing 86Box, locating your disk image, and configuring compatible hardware settings, you can often transfer your virtual machine with minimal difficulty.
With the correct setup, 86Box can provide a flexible platform for running classic operating systems and experimenting with vintage PC hardware configurations.
The Discover News Editorial Team publishes original, research-based content across business, digital marketing, home improvement, lifestyle, and general news. Articles are written, edited, and reviewed with a focus on accuracy, clarity, relevance, and reader value, and are intended for general informational purposes only.